Cleaning and re-oiling your dirt bike’s air filter is a critical maintenance job. The quickest way to destroy your engine is to let it inhale a lungful of dust. To avoid unnecessary expenses it’s very important to always ride with a clean air filter.
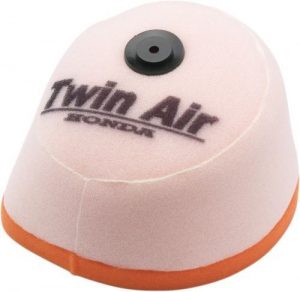
There are three main types of air filters, paper, cotton, and foam.
Paper filters are what is commonly used in cars, but a dirt bike requires a much higher level of filtering, with the ability to still breath when covered in dirt
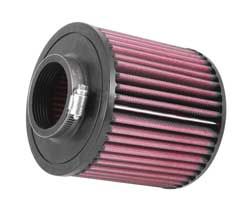
Cotton filters like K & N Filters are generally more expensive than the other types, but they will last years and provide an excellent level of filtration.
In this article, we will focus on cleaning your foam air filter. Twin Air claim that a properly oiled filter will flow more air than a dry one, and catch more dirt than an over oiled one.
 Before we get into the cleaning process, here are a few handy points to note:
How often should you wash it?
It is recommended that you check your air filter after every ride. Even if it hasn’t been a particularly dusty day, if you have been riding sandy or grassy trails, there is probably grass seeds or sand on the filter.
Are all foam filters created equal?
The short answer is no. There is a huge variation in quality available. Generally speaking, you get what you pay for. It’s difficult to tell by looking at them, it’s their longevity that differs. A cheaper filter is losing its shape after a few washes. A filter with higher quality foam if washed and maintained correctly should last you about 12 months, depending on how often you ride.
What fluid is best to clean it with?
If you’re caught short without a special purpose Air Filter Cleaner, Mineral Turpentine, which is oil-based, is the next best product to clean foam filters with because it is safe for both the foam and the seam glue.
Petroleum-based products will affect the foam and make the glue in the seams brittle. Never use petrol or metho. Petrol will cut through the oil better than any filter cleaner or solvent, but it will eat rubber grommets, seals, and glues and degrade the foam. after a couple of petrol washes, it will look limp and soggy even when it’s dry.
Do I always need to finish off by washing in soapy water?
A lot of soap products have chemicals in them that can deteriorate the foam. If you want to rinse out the last of the dirt, it’s best to use warm water only or do a second clean with the turps. If you must use a detergent or soap be sure to rinse thoroughly.
Can I oil it as soon as it’s clean?
It’s absolutely critical that the filter foam is 100% dry before you re-oil it.
If there is any moisture left in the foam, it will rot. Let it dry in the sun preferably and ideally let it dry overnight.
How much oil should I use?
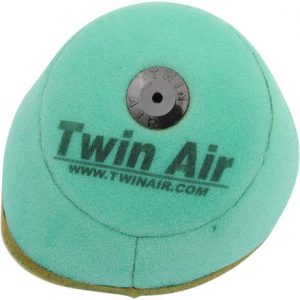
Oil is colored so that you can see if there is an even spread in the foam, and you can easily see sections not carrying oil. A perfectly oiled filter should only leave a slight residue on your fingers when you touch it. Never wring or twist the filter, just squeeze out as much excess oil as possible.
Spray on oils are available, but beware of applying too light a coat. For a foam filter to work properly, the foam must be saturated, then squeezed out.
I’ve used Motul Air Filter oil for years, and have never had a problem with filter life, or efficiency.
Do I need to leave it for a few hours before starting the bike?
Yes, if you used a synthetic oil that has alcohol in it to make it easier to apply. You’ll have to wait to allow the alcohol to evaporate. Generally, try to avoid synthetic oils with alcohol. The alcohol will tend to eat the glue on some cheaper filters.
Mineral oil is the best way to go, as you can start the bike as soon as you’ve installed the filter. Mineral oil is thicker, takes a little longer to apply, but is less inclined to dry out.
Tip: Ideally you should have two or three filters and rotate the use of them. It’s also handy if you’re going on a two-day ride, you can have a spare filter oiled and ready for use the second day. Store it in a zip-lock plastic bag.
If you only ride every month or two, your filter won’t last as long, because it will attract moisture while it’s sitting in the garage. Moisture will rot the foam.
It’s possible to buy pre-oiled air filters now if you really don’t want to be bothered with the messy job of cleaning them, and money isn’t an issue.
Tip: A good idea if you’re doing a multi-day ride is to use filter skins. It’s a thin cover that fits over your filter and stops about 90% of the dirt. When you’re riding the second day, you can just remove the skin, and you’re left with a clean filter for your day’s ride. They’re made to fit over almost any filter.
Cleaning Your Filter
You Will Need
- Turps or a proprietary cleaner (Motul or similar)
- Filter Oil
- Grease
- Plastic bag
- 2 Pairs of latex gloves
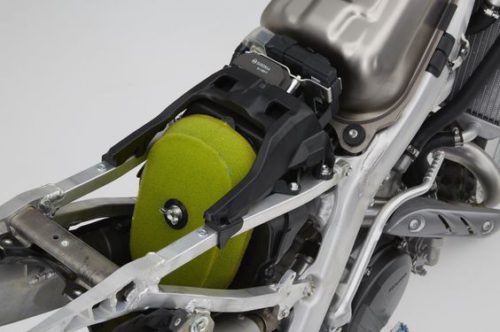
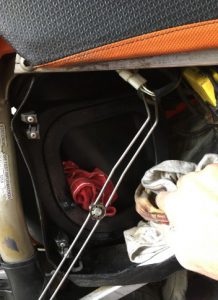
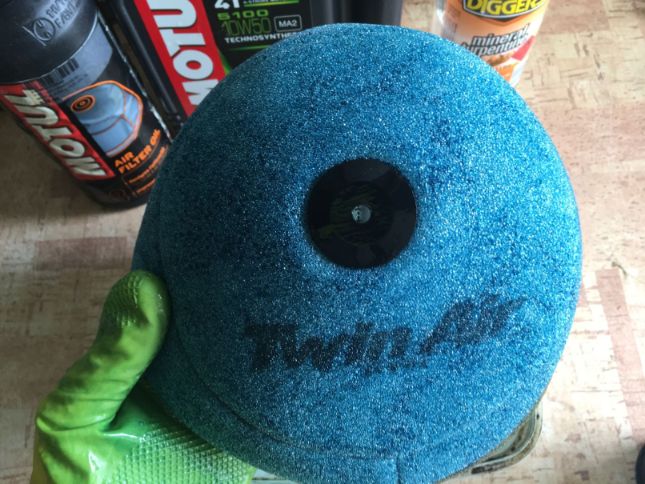
Step 1 – Remove the filter
Pull on your latex gloves to start with because this is a dirty job at the best of times, and air filter oil is nasty stuff. Use a rag to wipe out the airbox before removing the filter from the airbox. Then remove the filter from the cage. Put a clean rag into the air intake to prevent any dirt from dropping in.
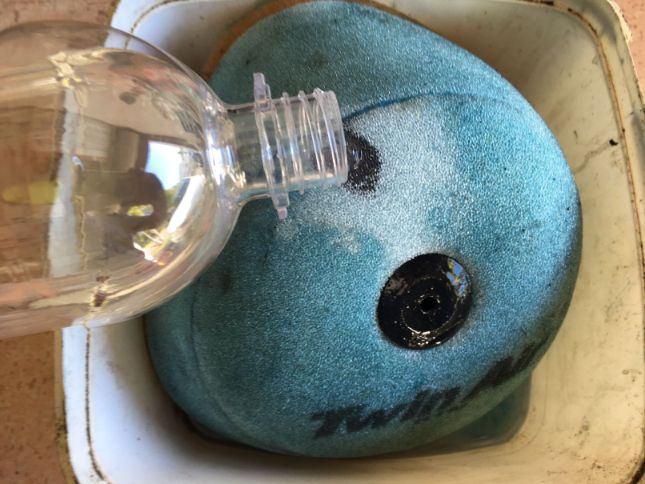
Step 2 – Apply the Cleaner
The first task is to break down the existing filter oil. Pour some Air Filter cleaner or Turps into a clean small tub (or old ice cream container) and squeeze out as much of the old oil as possible.
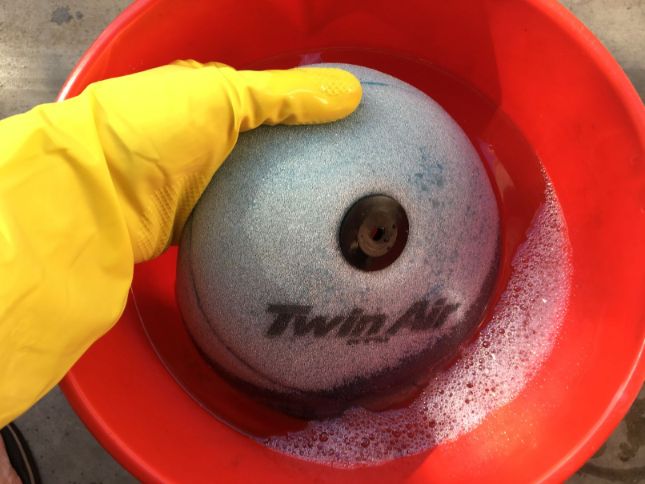
Step 3 – Wash in warm water
Once you’ve squeezed out as much of the turps as possible, fill up a bucket of warm water. Put on a clean pair of latex gloves and wash the filter in warm water.
If you must use dishwashing detergent for its oil dissolving agents, be sure to rinse the foam in clean water. Many soaps have chemicals that will deteriorate the foam.
Step 4 – Drying before re-oiling
It’s absolutely critical that the foam is dry before re-oiling it. Leave it in the sun if you can, and leave it overnight if possible. Never put it in the dryer. The heat will break down the glue, and besides, you will never get the stink out of the dryer.
Step 5 – Apply the fresh oil
Put the clean, dry filter into a tub and pour a small amount of air filter oil onto it. Like pouring syrup onto a pancake. Some guys like to totally submerge the filter in the oil to ensure it is totally covered.
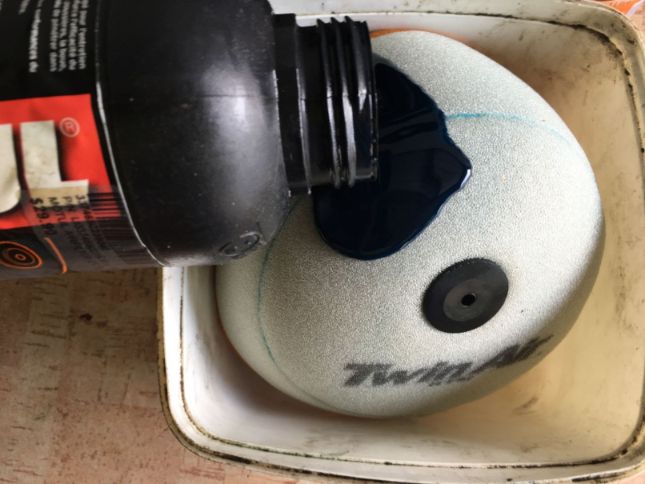
Squeeze it through till the oil color has completely changed the filter color. Be careful not to twist or wring it, just squeeze gently. You may have to add more oil several times till it’s evenly spread through the filter.
Squeeze the oil out till it is evenly spread throughout the filter and leaves only a slight residue on your fingers.
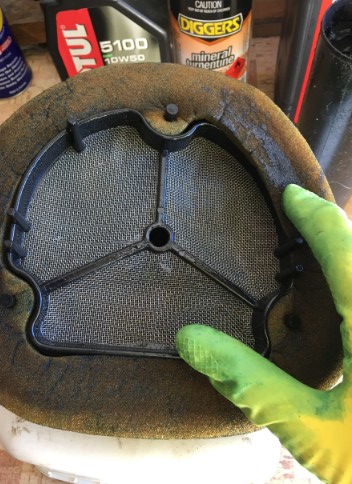
Step 6 – Refit to cage and grease
Make sure the cage is clean, then refit the filter over the cage and smear a bead of grease around the rim that seats onto the airbox. This just gives you a bit extra assurance that it will seal up against the airbox.
When you refit it into the airbox, run your fingers around the circumference of the filter to ensure it is positioned correctly and air cannot enter around the edge.
Summary
Now you are ready to ride. The three most important things to remember for avoiding premature damage to your engine are:
- Always ride with a clean, fresh air filter.
- Change your oil regularly with good quality oil.
- Always run your bike on the highest octane petrol you can get.
Today’s high-performance bikes require a bit more attention to keep them in good order. Just by doing these three things you will give your engine the best chance for a long and trouble-free run.
Here’s a great video to better explain cleaning your air filter.
Related Posts
 How To Install Dirt Bike Grips

Preparing Your Bike For Sand Riding: 8 Essential Tips

Do you have any tips for cleaning your air filter? Help readers by sharing any ideas that work for you in the comments below.