
It’s never fun to put your dirt bike into storage, but if you live in an area where freezing winter temperatures make riding unpractical, you have no choice. Follow these 10 simple steps on how to winterize your Dirt Bike so that it’s ready to go when the time comes.
Here in Queensland, Australia, it’s not the cold that prevents you from riding, it’s the heat!
With summer temperatures getting up to 35-40 degrees Celcius (100 degrees Farenheight and up) sometimes it’s just too hot to put all that gear on for a ride. Thankfully it’s a bit cooler in the forests, so once you’re riding the heat is manageable, but you still have to load, unload and get your gear on in the heat.
Whether it’s cold weather, hot weather, or you’re just unable to ride for a longer period of time, putting your bike into storage is sometimes necessary.
Here are 10 simple steps for how to winterize your Dirt Bike:
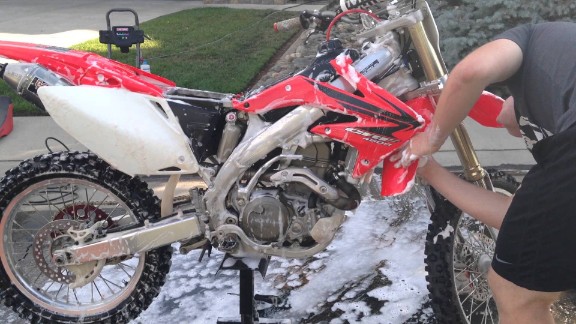
Step 1: Wash Your Bike
Obviously, you don’t want to put a bike away dirty, so wash it as best you can.
Any dirt left on the bike will be almost impossible to remove after a few months in storage. Replace any broken or worn-out parts now. You don’t want to find them right before you’re ready to ride again.
Also, make sure it is completely dry before storing it. Any metal parts that are wet, like brake discs, will have begun corroding while in storage. Spray metal parts likely to rust with WD40, except the brake discs of course.
Protect your plastics with a coating of a silicone spray like Maxima SC1 so that they don’t deteriorate during storage.
For tips on washing your bike: How To Wash Your Dirt Bike Properly
Step 2: Engine
It’s good practice to change the oil and filter before you store it.
The old oil will have foreign particles in it that over time can cause damage to engine parts.
Run the engine briefly to ensure all the internal parts are coated with fresh lubricant.
If you have a 4-stroke bike, change the oil and filter. If you have a 2-stroke bike, change the transmission fluid.
Another step to take if you’re storing the bike for more than a few months is to add a teaspoon of engine oil directly into the cylinder by removing the spark plug and pouring it in the spark plug hole.
Reinstall the spark plug and leave the plug cap disconnected (so that the bike doesn’t start) while you crank the engine over a few times to distribute the oil evenly around the cylinder.
Do this after you’ve run it for the last time in the steps below.
Step 3: Fuel
An important step in storing your machine is taking care of the fuel.
Petrol contains a significant amount of ethanol which is added to petrol to reduce emissions.
The problem is that it tends to attract water, and that will be harmful to your fuel pump, fuel injector, or carburetor over time in storage.
An effective way to deal with this is by adding a fuel stabilizer like STA-BIL to your gas tank before storage. This eliminates any moisture buildup in the tank and fuel system.
Storage periods of three months or longer require a fuel stabilizer.
Add the stabilizer, then run the engine for 5-10 minutes to ensure the treated petrol has circulated to all the fuel components.
Turn your fuel tap off and keep it running until it runs out of fuel, this will drain all the fuel from the carb bowl.
If you decide to drain the tank, most modern dirt bikes use a plastic or aluminum tank, so rust is not an issue, but a drained steel tank will require a coating of a Fogging Oil like STA-BIL to prevent rust.
Step 4: Radiator
If you live in a warmer climate and have been keeping up with regular maintenance intervals, you’re probably okay to store the bike without adding antifreeze.
If you live in an area where temperatures reach sub-zero, then replacing the coolant with anti-freeze is necessary.
Most manufacturers recommend changing the coolant every two years. Check your owner’s manual for recommendations for your specific bike, but if you haven’t been keeping up with the maintenance intervals, flush the cooling system and replace it with fresh antifreeze.
Step 4: Battery
If you leave your battery in the bike, it will not fire up again in a few months.
It’s best to remove the battery and put it on a trickle charger (or smart charger) that keeps the battery at a full charge but won’t overcharge the battery.
If you leave the battery installed in the bike and it completely drains, it will damage the battery and won’t work properly when it comes time to use it again.
Battery life is about 3 years, so if it is getting close to that, you may be up for a new one when it comes time to ride again.
For more battery tips: How To Replace Your Dirt Bike Battery
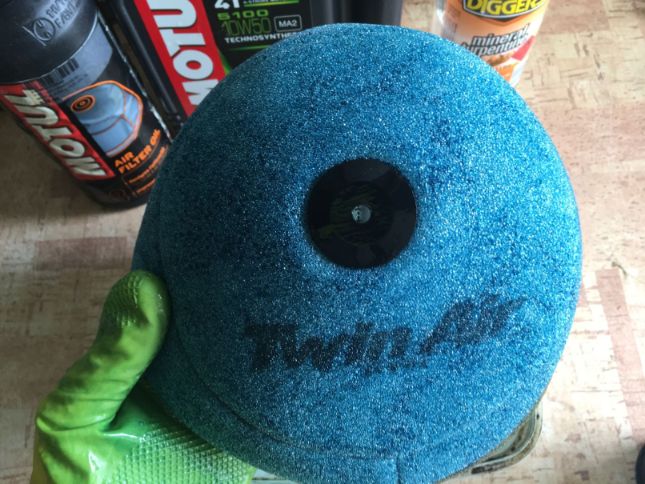
Step 5: Air filter
Cleaning the air filter as normal is a good idea before storing your bike.
Dirt and dust particles sitting in the filter for a longer period of time will be harder to clean when it comes time to ride again.
Store your bike with a nice clean air filter and you’re ready to go when the time comes.
For tips on cleaning your air filter: How To Clean A Dirt Bike Air Filter
Step 6: Chain and Sprockets
It’s a good idea to clean your drive chain and spray it with a good lubricant before storing your bike.
This will help extend the life of your chain and prevent it from corroding and stiffening up while in storage.
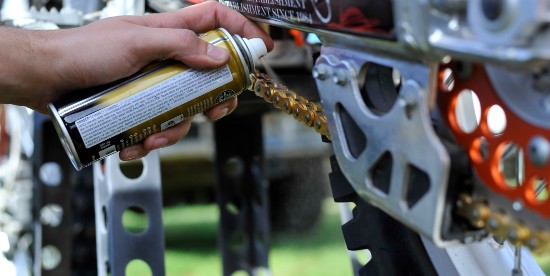
The last thing you want to do when it’s time to ride again is to clean the chain first.
For tips on cleaning your chain: How To Clean A Dirt Bike Chain
Step 7: Suspension and tires
Most dirt bike riders put their bike on a stand anyway, but it is important for long-term storage.
Store your bike on a lift stand that keeps both wheels off the ground, ideally.
This takes the pressure off the suspension, and also the tires, avoiding the possibility of flat spots in the tires.
Step 8: Cables
If your bike doesn’t have a hydraulic clutch and brake but has cables, it is a good idea to lubricate them.
If you’ve been keeping up on your standard maintenance and lubricating them regularly, you can probably skip this step, but if you haven’t, lubing them before storage is something worth doing.
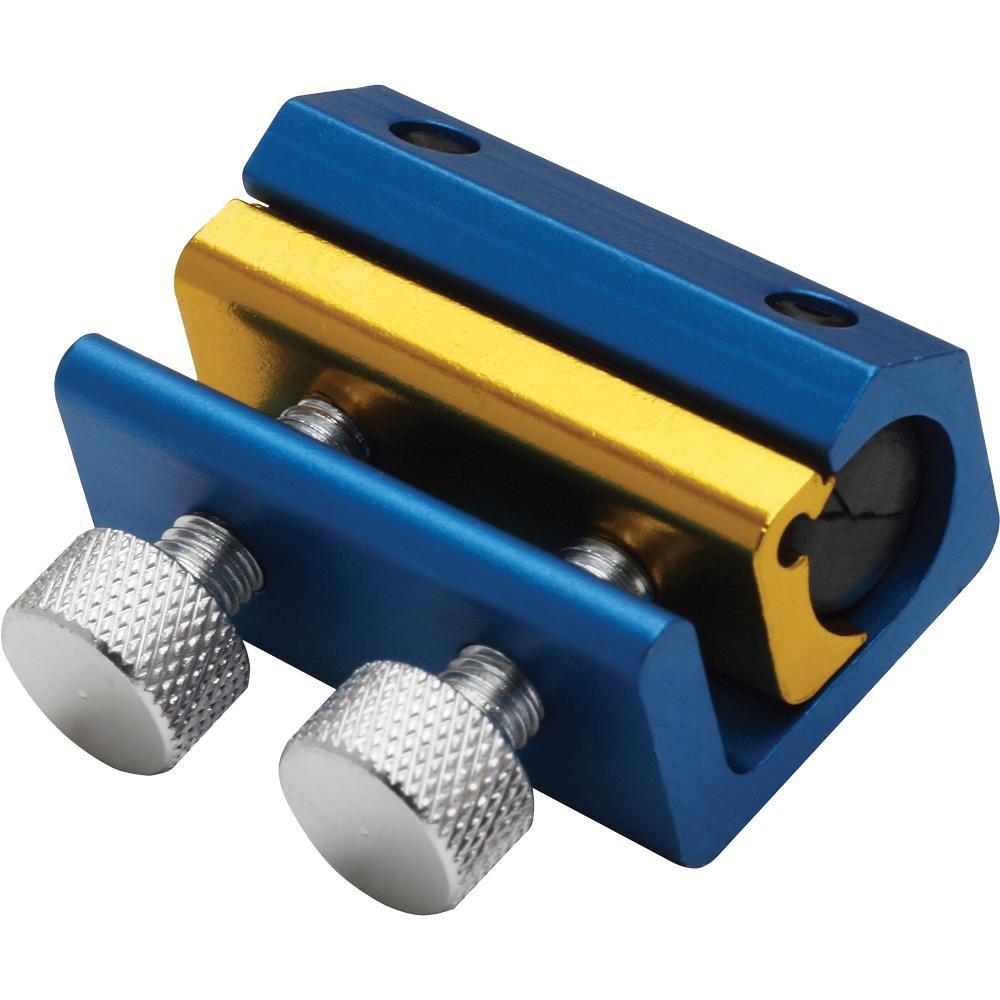
A nifty little tool for doing this is the Motion Pro Cable Luber and some WD40.
Step 9: Storing Your Bike
Cover the bike with a tarp, blanket, or old sheet that is breathable to protect it from dust and dirt buildup over time.
If it is stored in a garage that is attached to the house and is at a temperature that is not much different to the house temperature this is not so important.
If the bike is stored in a shed that is not completely waterproof and the temperatures get to sub-zero, it’s a good idea to cover the bike.
It’s also a good idea to plug up the exhaust pipe before storage. This will keep moisture and condensation out and also prevent bugs and other vermin from setting up home in there.
Step 10: Check The Tire Pressure
Check your tire pressures and pump the tires up to the normal pressure.
This is generally around 12 psi for normal conditions, but of course, it depends on the tire type and your riding style.

For more on tire pressures: Dirt Bike Tire Pressure: What You Need To Know
Final Thoughts
If you follow all or at least most of the steps in this guide, your bike should be good to go when the time comes.
All you’ll have to do is put the battery back in, check the tire pressures and top up the fuel if you have emptied the tank.
Remember to do your usual pre-ride checks. A little bike prep goes a long way to keep your riding trouble-free.
Related Posts
 How To Adjust Your Dirt Bike Suspension – A Do It Yourself Guide
How To Replace Your Dirt Bike Battery
Do you have any winterizing tips that we’ve missed? Feel free to us know your thoughts below.