Your dirt bike helmet is one of the most expensive items in your gear bag but is often overlooked when it comes to cleaning if it is not visually dirty. Knowing how to clean your dirt bike helmet properly and maintain it will go a long way towards getting the longest lifespan possible out of your helmet.
You’ve spent good money on a well-designed, beautiful helmet, so here are some guidelines for looking after it and protecting your investment.
Other than impacts, the fastest way to destroy a helmet is by improper maintenance or lack of maintenance altogether.
Helmet Care Do’s and Don’ts
Cleaning your motorcycle helmet the wrong way, or using the wrong cleaners will end up doing the helmet more harm than good.
Do:
- Use only mild soaps and cleaners on the liner and shell
- Use soft scratch-resistant cloths with gentle pressure to prevent scratching of the shell and visor
- Use a soft toothbrush or cotton buds to clean out vents
- Air-dry the helmet and liner or use a fan. Avoid heat and direct sunlight
- After cleaning protect the shell with an automotive wax or helmet wax
- Lubricate any moving parts with a silicone spray
Do Not:
- Use any petroleum-based solvents or cleaners on your helmet
- Scrub the helmet shell or visor harshly to remove stubborn dried dirt or bugs
- Use any ammonia-based glass or window cleaners on the helmet visor
- Use any harsh soaps or dishwashing liquids on the liner
- Use a clothes dryer, heater, or direct sunlight to dry the liner
- Store your helmet in the gear bag or helmet bag, but in a well-ventilated space
- Do not store your gloves inside your helmet, they get sweaty also.
It’s best to wash your helmet liner after every ride. Even if it hasn’t been a muddy day and the helmet shell is still clean, the liner will be sweaty.
Sweat is the natural enemy of fabric and foam. If left unwashed it will deteriorate over time. The same goes for the foam on your goggles.
These days most helmets have a removable liner and cheek pads so that they can be washed.
Back when I first started riding, helmet linings couldn’t be removed and washed. I’ve had to replace many helmets over the years simply because the liner had deteriorated, the rest of the helmet was fine.
Get Your Supplies Together
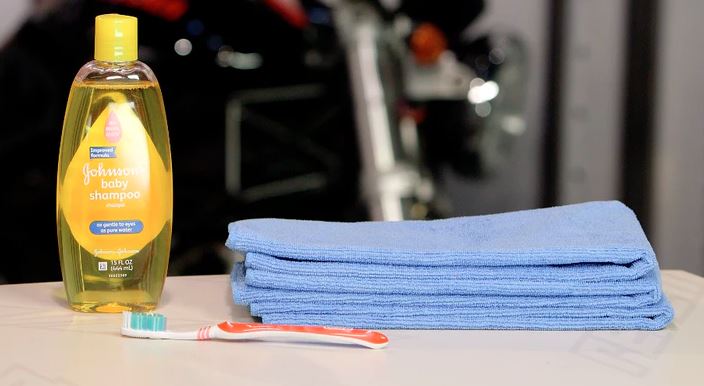
Microfiber Towels or Cloth: These are ideal for washing the helmet and face shield, as well as drying it when finished.
Soft Toothbrush: This can be especially useful for getting into those hard-to-reach places that you can’t get to with the Microfiber cloth, like around vent covers, visor, and face shield gasket. Cotton buds are also useful.
Baby Shampoo: It’s cheap and is as gentle as you can get for a cleaning agent that is not petroleum-based.
Removing The Liner
Take care to gently remove your helmet liner. They are fairly delicate and can be easily torn, especially when popping off the press studs and separating it from the edges of the EPS liner.
It’s there for your protection as well as comfort, so avoid using excessive force.
Washing The Liner
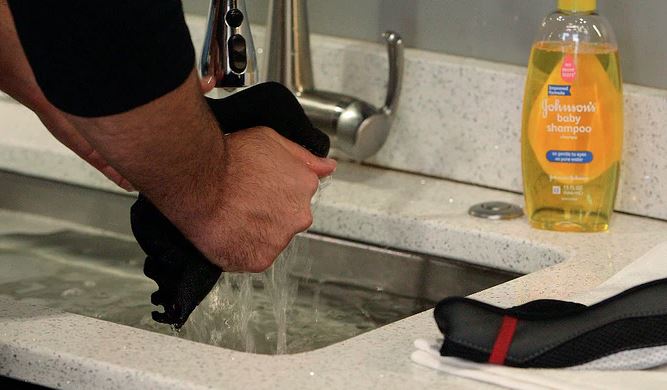
It’s best to just hand wash the liner and cheek pads in warm soapy water. A gentle cleanser like baby shampoo has no harsh chemicals that will deteriorate the foam, or cause irritation next time you wear it.
Some people throw the liner and cheek pads into the washing machine, but personally, I think it is too harsh. If you must machine wash them, be sure to use a delicates bag and wash on the gentle cycle with a mild soap.
Pat them dry with a clean towel and let them air dry. It’s best to not use a clothes dryer to dry them, it will misshape the inner foam. Just leave them somewhere well ventilated at least overnight before refitting them.
Once the liner and cheek pads are removed, it may be necessary to wipe out the interior of the EPS liner, maybe not every time you clean your helmet, but every now and then to keep it smelling fresh.
The EPS liner is neither heat nor solvent-proof, so just use a soft damp cloth to wipe it out. Take care not to scratch or cause indentations in the EPS liner.
Don’t forget the helmet straps. Sometimes these also have padding, but they can’t be removed from the helmet, so wiping them down with a damp cloth is all it needs.
If your helmet is one of the few that has a non-removable liner, the best way to clean it is to wipe it out gently with a soft damp cloth and a neutral cleaning agent.
Dry it by placing it on a rack in front of a fan to ensure it gets good airflow through the helmet, with the visor open (if it has one). Avoid heat and direct sunlight.
Washing The Outer Shell
When cleaning the shell of the helmet, it’s important to not scratch the paint surface when removing the dirt.
If it’s been a muddy day and the helmet has lots of dried mud on it, just use some running water to get the worst of it off. Then use a soft, non-abrasive cloth and some warm soapy water to remove the rest of the dirt.
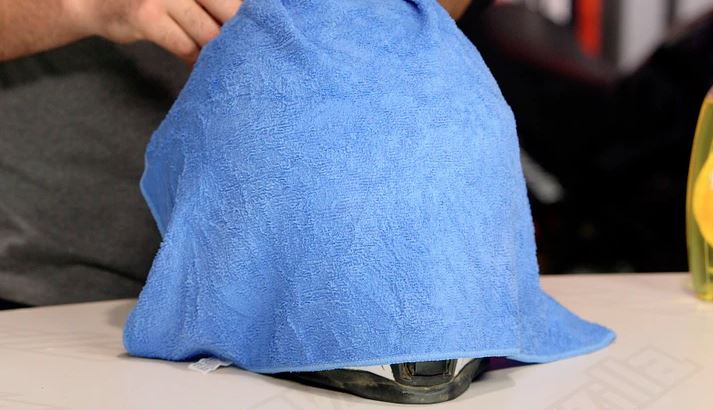
Laying a warm wet cloth over the helmet for a few minutes can loosen up some dried-on dirt and dead insects.
For hard to reach areas like under vent covers, it may be necessary to use a soft toothbrush or cotton buds to get into the corners.
When cleaning the plastic parts of your helmet like vent covers, chin vent, visor, and face shield, be sure not to use cleaners containing solvents, acids, or any type of ammonia-based window cleaner.
These can deteriorate the plastic and remove any anti-fog treatment on the inside of the face shield.
Use a Microfiber cloth or Microfiber Towel to gently clean the face shield, being extra careful not to scratch it.
Internal sun visors should rarely get dirty. A gentle wipe down with a Microfiber cloth is all that is needed.

After drying the shell it is a good idea to protect it with automotive wax or helmet wax. It brings back the shine and makes it easier to clean next time.
Once your helmet is clean and dry, now is a good time to inspect it for chips, cracks, or scratches. If you have had even a minor crash that has impacted the helmet, it may be time for a replacement.
Manufacturers advise riders to replace the helmet after a significant crash, whether or not it shows any signs of damage.
Reassemble The Helmet
Reassemble your helmet starting with the completely dry liner and cheek pads.
Then reattach the face shield, visor, Bluetooth system, helmet cam, and anything else that you removed prior to cleaning your helmet.
Storing Your Helmet
Personally, once the helmet is clean and dry, I store the helmet out of the gear bag or helmet bag, somewhere that is dry and well ventilated.
This is the best thing you can do to keep it smelling fresh for your next ride.
Your helmet should be kept indoors rather than in a damp shed. A storage rack is a good idea and is ideal for display if you have multiple helmets.
Sitting them on a wall hung or free standing shelf will also allow them to dry out completely.
What Is The Lifespan Of A Dirt Bike Helmet?
Helmets like most items have an expiry date. Most helmet manufacturers recommend it be replaced after 3 to 5 years, but you will generally not get more than 7 years out of a helmet if it has had no impacts.
If you have had a crash and hit your head hard enough to make you think “I’m glad I was wearing a helmet” that is a good indication that it’s time for a new helmet.
Signs of impact may not be obvious on the outer shell, but the EPS liner may have been compressed in the impact.
The materials used in the construction, the fiberglass, EPS, and plastics all become brittle with age, so even if the helmet hasn’t had an impact, it will no longer be safe.
Most manufacturers put a sticker inside the helmet which gives the manufacture date so that you can calculate its age.
If you find your helmet has reached its use-by date, these articles below may be of some help to you.
Related Posts

Buying A Dirt Bike Helmet – What You Need To Know
 6 Best Dirt Bike Helmets – Entry Level

5 Best Dirt Bike Helmets – Top Of The Line
Do you have any tips or tricks for cleaning your motorcycle helmet? Please feel free to leave your thoughts below.
Some great advice in there. “Sweat is the natural enemy of fabric and foam. If left unwashed it will deteriorate over time. The same goes for the foam on your goggles.” – is a particularly good reason not to store your gloves inside your helmet when not in use.
Hi Ojay. Yes, that’s also good advice, not storing your gloves inside the helmet. Gloves get pretty dirty and sweaty also, so putting them inside the helmet is not a good idea.
It’s just great that helmets now have removable liners for washing. Back in the day, there was nothing you could do to clean them other than wipe them out.
Thanks for your thoughts.
Greg
Optimal procedure: position components in a well-ventilated space for thorough air drying.
Hi Dalton. Yes, that’s a good tip. Thorough drying in a well ventilated space. Thanks for your thoughts.
Greg
Thank you. I also really love your article. This was a great, informative post.
Hi Dalton. Glad you got something out of the article to help out. I’m so glad that helmet linings are able to be removed and washed. I’ve had to discard so many helmets just because the lining had deteriorated and it couldn’t be removed.
Greg